Connect with the Expert via email, text or phone. Include photos, documents, and more. Get step-by-step instructions from verified Tech Support Specialists.
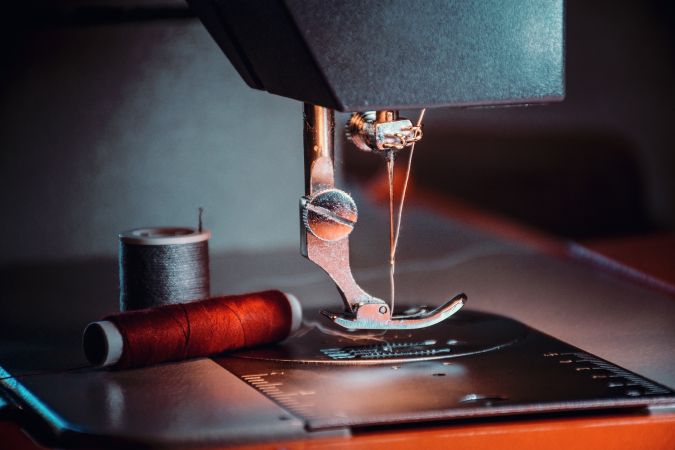
A sewing machine is an electrical appliance that is used for making clothing, quilts, bed sheets, curtains, and other home products.
The most common types of sewing machines are sergers, straight stitch machines, and an automated sewing machine. There are also sewing machines that can be used for embroidery. These are called embroidery machines.
There are also different types of stitches available on a typical sewing machine like buttonhole stitches, straight stitch and zigzag stitches etc. These different types of stitches can be used for various purposes such as appliqué work or garment construction.
Above all, make sure to always check that the threads are proper throughout the Kenmore sewing machine before you start operating it. The threading process is pretty simple, but you still need to do it with exactness. In addition, some Kenmore models do include its own differences from others that need to be taken note of.
Connect with the Expert via email, text or phone. Include photos, documents, and more. Get step-by-step instructions from verified Tech Support Specialists.
Here’s how to thread a sewing machine, particularly one branded as a Kenmore:
Thread the needle
Start by putting your thread onto the spool. As a rule of thumb, use an equal amount of thread on both sides of the needle. Then, tighten the screw on the right side of the sewing machine and pull it through the machine’s spool.
Insert your needle into the front hole located on the left side of your sewing machine and gently pull it outwards until you have threaded it through both threads. You should now be able to pass your needle through both threads. Pull it all the way out again and push it in to make sure that you have successfully threaded your needle correctly.

Set up bobbin tension
Once you have completed threading your sewing machine, set up bobbin tension by pulling down a little bit on one side of a bobbin while pushing down on another part to make sure that they are evenly balanced. Once this is done, let go and let them settle back into place before you start your sewing machine.

Help with setup and starting issues, blinking error lights & all your repair needs in just minutes
Ask a Repairman Live NowStart threading the top
With the bobbin threading, you are now ready to start your sewing machine. To start the machine, turn it on by pushing the pedal on the right side of your sewing machine down and releasing it again. Then, push down on the pedal located on the left side of your sewing machine to move it forward until you hear a little buzzer sound coming from underneath the foot control. Once this is done, turn your sewing machine on and wait for it to finish its initial startup process before you begin working with it.
When you have completed all of these steps, you should be able to successfully thread a Kenmore Sewing Machine and get started working with it as soon as possible. Remember that this is a learning journey and you should not be afraid of messing up or missing a step if it’s your first time using the machine.

Max Anthony
Mainly Max Anthony is an athletics tutor & lives in Texas but that's not it. He's is also a music producer, content creator, record producer, writer, and session musician. He has been producing music and engineering at a lower level for over 5 years. His passions include quality music gear and that's what he loves to write about on HifiBeast. ( Shoot him an email now )
Help with setup and starting issues, blinking error lights & all your repair needs in just minutes
Ask a Repairman Live Now