Connect with the Expert via email, text or phone. Include photos, documents, and more. Get step-by-step instructions from verified Tech Support Specialists.
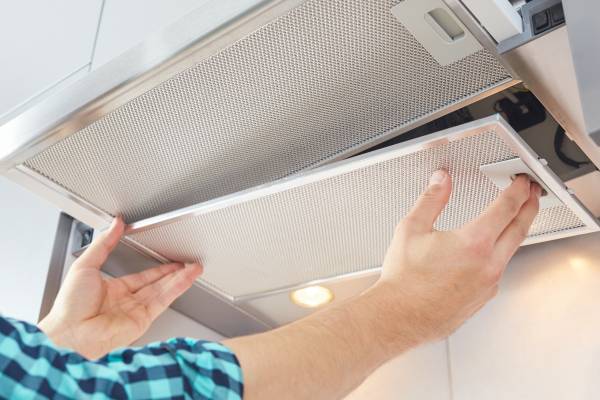
The Thermador hood filters are on the lower part of the hood. They are very easy to clean, but you should not use any abrasive cleaners on them.
Step 1:
There are two parts to the filter. First, you have the frame that holds the filter and then you have the actual filter itself.
To remove the frame, turn off your appliance and unplug it. Then open the front of your hood.
Use a screwdriver to loosen the screws on either side of the hood so that you can remove them
Connect with the Expert via email, text or phone. Include photos, documents, and more. Get step-by-step instructions from verified Tech Support Specialists.
I would suggest using a putty knife to pry up each side of the frame. You may need to wiggle it back and forth a little bit before it will come up with a little bit of force.
Once you have removed both sides, set them aside for now.
Next, remove each side of the filter by gently pulling them away from each other with your fingers and prying at them with a putty knife or small screwdriver if needed. Once they are loose, set them aside for now also
Step 2:
Now that you have removed the frame and the filter, you can see that there are three parts to the filter.
The first part is the filter itself.
To remove it, lift it straight up and off of the hood. The easiest way to do this is to pull straight up on it.
The second part is a small frame that holds the filter in place. It should come off without too much effort. Set it aside for now also.
Finally, there is a third part that attaches to the back of your hood and is attached by screws.
You will need to unscrew these screws from their locations and then lift this section of your hood off of your appliance. Set it aside for now also.

Help with setup and starting issues, blinking error lights & all your repair needs in just minutes
Ask a Repairman Live NowStep 3:
Now that you have removed the three parts of the filter, you can see that there are a couple of places where some debris may have accumulated.
Use a small brush or your fingers to clean these areas.
Step 4:
You should be able to see that there is some type of white residue on the inside of the filter.
Use a toothbrush to remove this. Do not use any kind of abrasive cleaner on it because it will damage it and cause it to rust over time.
Once you have cleaned all of the white residues off, wipe down the entire filter with a soft cloth or paper towel and make sure there are no remaining stains or debris on it.
Step 5:
Reattach the frame and then the filter back onto your hood. Make sure that the frame is attached properly and that the screws are tight before you close up your hood.
Turn on your appliance and test it out to make sure that everything is working properly now.

Max Anthony
Mainly Max Anthony is an athletics tutor & lives in Texas but that's not it. He's is also a music producer, content creator, record producer, writer, and session musician. He has been producing music and engineering at a lower level for over 5 years. His passions include quality music gear and that's what he loves to write about on HifiBeast. ( Shoot him an email now )
Help with setup and starting issues, blinking error lights & all your repair needs in just minutes
Ask a Repairman Live Now